Before you start reading this you should brew a cup of tea, find a comfy chair, relax, and be prepared for a lengthly post... Or scroll through and look at the pics and call it a day!
The making of my third wedding cake began about a year ago when my sister-in-law asked me to do her wedding cake. I began to think of all of the amazing possibilities and soon after began baking "test" cakes at every opportunity. If there was a family gathering, I would come to it with a cake in tow for all to try...I won't bore you with the details so here is what was ultimately decided upon:
6-9-12" stacked wedding cake composed of Rose's new German Chocolate Cake and filled with Raspberry Ganache and frosted with White Chocolate Mouselline Buttercream
14" round White Butter Cake filled with Raspberry Neoclassic Buttercream and frosted with White Chocolate Mouselline Buttercream..this cake was also encased with Chocolate Plastic leaves -- it was going to be a birthday cake for my grandmother, but she fell ill and was unable to attend the wedding
9" round Dairy Free Carrot Cake (from Rose's Heavenly Cakes) and frosted with a tofu "cream-cheese" icing
Where to begin??
Raspberry Sauce...this crucial sauce is used to make the ganache and raspberry buttercream...plus I was also using this as an adornment for the cakes, so I figured this was the first step. This sauce is the best! Anything I've ever made with it is fantastic. I could have saved a day of thawing/pressing/straining 3 kg of raspberries by purchasing a premade jam/sauce, but it is honestly worth the effort.


Of all the test cakes I made, I did not bake a single chocolate cake until I landed my copy of Rose's Heavenly Cakes. I knew she had a new recipe for a chocolate cake and I was eager to try it out. I made one chocolate test cake and the new German Chocolate Cake beat out the Moist Chocolate Genoise (still one of my favourites). I had no complaints! Compared to any genoise, the German Chocolate Cake is so easy to prepare and it has a wonderful flavour -- it's dark and chocolatly, but not dense or dry (but you must use the syrup). I haven't tried it with anything but Green and Black's cocoa, so I imagine that would alter the flavour of the cake. May I also add it bakes up so incredibly level that I was giddy with excitement...no trimming. Unfortunately, I can't do more than two cakes in my oven at a time. So that meant 4 different batches!


For me, one of the least pleasurable tasks of cake making is syruping the cakes. I decided to torte each cake layer to make a total of 4 cakes per tier (3 layers of filling) -- part of the reason was to better distribute the syrup. I dislike soggy sections of cake or when the top part of the cake is wet, but the middle isn't. Needless to say, this involved lots of mess, flipping of cakes, and sticky syrup everywhere. Keep in mind this meant syruping 24 surfaces of cake!
After all of this, I stacked the cakes and filled them with raspberry ganache, wrapped them very well and froze them.
Next up was the white butter cake. I used Rose's chart in The Cake Bible and, honest to goodness, this was the nicest white butter cake I've made in a long time. I think I've finally figured out the idiosycrasies of my oven and with the aid of a flower nail and the magic cake strips, I baked two beautiful, level 14" round cakes! Once again the fun task of torting and syruping the layers. And since I didn't have room for 4 -14" cakes in my kitchen, I whipped up the Neoclassic Buttercream using the leftover egg yolks from the German Chocolate Cake, filled the cake, and wrapped it well for the freezer.


At this point, all I had to finish preparing was the White Chocolate Mouselline BC. I needed to make 2 batches using 1.5 lbs of butter per batch. I actually prefer the old method of making the mouselline BC -- I've never had a problem with it. But, I like a higher meringue to butter ratio, so I used the proportions of Rose's new recipe, with the method of the old one and it turned out wonderfully. I froze these batches, however, upon thawing and rebeating, there was a slight granular texture to the buttercream. I wonder if it was the chocolate? But, I did not notice when I ate a piece of cake...perhaps it dissolved, or was unnoticeable.


Both batches of MBC mixed together to balance out variations in taste and color
The decoration on the cake was to consist of ribbon around the base of each tier with starburst motif design in MBC piping. This looked simple, but I can't draw so I needed a template of sorts. I decided to draw out the designs, adhere them to sponge board, and then use sequin pins to create the "dots." I was seeing circles after an evening of this!


I always like to do something a little special for "plating," so in addition to the raspberry puree, I wanted to make a white/dark chocolate monogram of the couple's initials. I also, at this point, still thought my grandma would be in attendance, so I decided to encase the white butter cake in white chocolate plastic leaves and adorn the top with a single white rose.


The leaves were cut easily using rose leaf plunger style cutters.
The day before D-Day (decorating day) I was going to prepare the carrot cake. I didn't know if I would be able to freeze it as I was going to make a tofu-based cream cheese icing -- and, not having worked with tofu before, I was't going to chance it by putting the completed cake in the freezer. I also did not do a test cake for this either. The cake batter tasted awesome and baked up perfectly, despite my fears it was looking a bit uneven in the oven. Way to go Rose, you did it again. The icing was my proudest creation because it involved more risk than I usually take. I wasn't working with one of Rose's recipes and I was working with new ingredients. Usually, the dairy allergic guests are forced into eating shortening and confectioner's sugar based frostings. I wanted to give them something better. My Tofutti (tofu cream cheese) supplier ended up not getting the Tofutti in time, so I found a restaurant, The Upstairs Restaurant, which was able to provide me with enough to do the cake. Thank you! I adapted the cream cheese icing recipe from The Sweeter Side of Amy's Bread and used Earth Balance vegan butter and Tofutti in place of the cream cheese. The unique aspect of their recipe is that they use poured fondant as a sweetener. I ended up using more fondant than the basic recipe called for, and some vanilla and lemon oil, but the result was very good...especially considering there wasn't a drop of dairy in it!


At this point, I think almost all of the cake components were prepared. I hoped one day would be enough to assemble, frost, and decorate the cake. I have discovered some wonderful die cut cardboard rounds. They are so smooth on the edges. If you decide to use a bench scraper to smooth the sides, this helps trememdously and having your cake larger than the turntable (so the scraper can go below the edge of the board) is a must. It took me awhile to figure this out so I spent a better part of the day smoothing the cakes.


Decorating was a slow process. I had to chill cakes before stamping the templates on the cakes, then pipe the designs, rechill to do the ribbon. I had to attach parchment to the back of the ribbon so it wouldn't absorb grease from the frosting. And, honestly, is there anything more nerve wracking than trying to place one tier on the other...nothing like a wee bit of stress. You've got one shot and one alone to get it in place! Thankfully, I got the tiers placed pretty much where I wanted them. I must also express my gratitude to Fusion for selling me some bubble tea straws.

Finally, after a bit of Navan myself, it was 4:59 am when the lights went out:


Ok...slightly more nerve-wracking than stacking the tiers is driving the cake to the site. I posted my Wedding Cake on Board sign and drove like granny and gramps coming home from Sunday mass. I got attention from one driver who had quite a laugh at my over-cautious nature. But I was a bit daring and opted not to stake the cake. First of all, the laminated chip board I used seemed too hard to pound a stake through, so I decided to forgo the stake and I did not cut a hole in the centre -- also what if it didn't line up?? The wedding site was literally 5 minutes from my home. And I made it!
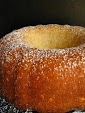
Here is the cake that was supposed to be for my grandma's birthday (also wedding cake, but for her too):

Thought I'd share this nifty little cake board I used to help portion the cakes:

The served cakes:


Every cake was very well received and I figure that if I am getting good feedback from people I don't even know, then it must be ok. The other true test is how much cake is left sitting on tables uneaten...I found maybe one piece. Thank you Rose...a real testament to your recipes, expertise, and amazing directions that enable even a home baker to produce fabulous results...so long as you follow directions.
I've concluded that one does not build wedding cakes unless you love doing it and/or you love who you are making them for. I don't think I could do this professionally unless I got much, much faster. For now, I will do this once a year for people I care about and that is all...I don't think I could handle 5 am nights every week (I do have a toddler though and I came out of it much better than expected). Now it's time to get some sleep!

Wow! such pretty wedding cake! It's amazing!
ReplyDeleteThese are amazing! I am especially impressed that you managed to do all of this with a toddler!
ReplyDeleteCongratulations Sherrie!!! What a wonderful job you did! Welcome to the wonderful world of pulling wedding cake all-nighters ;).
ReplyDeleteI totally agree with you on Rose's rasp puree... it's the best! (the strawberry is too!!)
Great job with the monograms and templates.
Check out my trick for applying syrup to cakes...
http://butteryum.blogspot.com/2009/10/almond-shamah-chiffon-cake.html
Looking forward to you baking with the Heavenly Cake Bakers.
:)
ButterYum
It sounds like you have a small kitchen and oven, which I do also. So I find it encouraging that big cake projects can come out of little kitchens.
ReplyDeleteThanks for sharing the info on the cake board for portioning the slices. It looks like you cut 18 slices from the 6". Does that say 82 slices from the 12 -- how did that happen? And how many from the 9"? Or am I even reading this correctly?
I don't have the RHC book yet, but I'm looking forward to trying the new mousseline recipe.
Kathleen
Hi Kathleen,
ReplyDeleteI actually have a regular sized oven, but I find if I put more than 2 cakes in it, they bake unevenly/poorly. I don't like moving cakes or opening the door more often than necessary, so I have decided to only do two (or one in the case of > than 9" cakes) at once. As far as the cake board, basically you cut cocentric circles into the cakes. The twelve consists of 3 circles, the nine two, and the six is not cut at all. Then slice the rings...the 6" has 18 slices (wedges), the 9" has the 18 from the 6" circle + another 28 or so from the outer ring. The 12" has the 18 from the 6", + 28" from the 9" ring, and another 38 from the 12" outer ring for a grand total of about 82-84. I don't follow it to the letter, but it keeps me on track. Thanks for asking!
Hi Sherrie - CONGRATULATIONS on a gorgeous cake. I love the design, it looks so professionally done. The flavor combo makes me drool! They sound so delicious. Thank you for sharing the story, the process, and the numerous pictures. I enjoyed looking at them!
ReplyDeleteSo beautiful and impressive. How nice that you can go back and look at the photos, even after the cakes themselves are long gone.
ReplyDeleteWow! I'm so impressed... your cakes look just amazing! Congratulations! I'm wishing that I knew someone getting married so I could make their cake!
ReplyDeleteב''ה
ReplyDeleteAmazing! Very well done.
Thanks for the explanation on how to cut the tiers. I knew the concept, and I have cut wedding cakes before, but I wasn't too exact about it. The board makes a lot of sense for helping the cutter stay on track for evenly cut slices.
ReplyDeleteRose illustrates this method on page 537 of TCB. Your cake board is a great idea.
Hello Sherrie, I love your write up of the cake story. It turned out stunning. And I love all the details of its creation. I am glad other people worry and rejoice over their cakes.
ReplyDeleteI wonder if anyone, outside of the makers of wedding cakes, understand how much time and planning that (plus the blood sweat and tears!) goes into the making of a wedding cake.
I love your design on the wedding cake, but your grandmother's cake is so lovely too!
I laughed at your 'wedding cake on board' sign on the car. So funny. I have my husband riding shot gun, if I have a cake in transport...just in case some numskull decides to cut me up! I can't even imagine having a wedding cake in the car! Honestly, I'd have to call for a police escort.
Well done on your cake. It is a marvel too that you have a toddler. When my daughter was little, many things never met completion.
These are all so lovely! I am deeply impressed.
ReplyDeleteHi there - I bookmarked your page and have been coming back over and over. Question for you - I don't understand how you got the concentric circles onto the cake? I'm far from an expert baker but have been the designated baker for most events I attend, and I'd love to do something like that! It looks amazing!
ReplyDeleteHi Lara,
ReplyDeleteThis is sooo delayed, maybe you'll visit again as I can't email you...I made copies of cocentric dot patterns (you can scale up and down, make extras) and then taped these to a thick foam board and inserted pins into the patterns taped to the board. I then pressed this pin pattern on to the buttercream so the approximate location of dots were marked. Hope this clarifies things.
Great Job! May I ask how do you transport the cake? do you use any packaging?
ReplyDeleteHi GloriaCake,
DeleteIn general, I usually use plastic storage containers. Preferably clear and odor free. For a cake like this, I get the largest that will fit in my fridge -- usually have to plan to empty it and take out a few shelves. I then put my cake on a large stable board (I have a big cutting board that I use) and set that on the inside of the lid (which will be under the cake) -- I invert the container over top. This usually gives me lots of room -- I sometimes tape a container with silica gel (absorbs moisture) on the board as well -- I either tape paper towel to the container with the s.gel in it or use an elastic and secure a cloth over it. I sometimes tape around the lid to prevent odors. Just be careful to hold from the bottom. I NEVER let anyone else carry the cake but me!